Related Articles

Create your Workflow
Read ...
Creating Campaigns
Read ...
Publishing a Post
Read ...
Posts Awaiting Approval
Read ...
Scheduled Content Publishing
Read ...
Publishing: Streamlined Content Distribution
Read ...
Rescheduling and Editing Posts
Read ...Manage how your posts are created on Sands-Social
Article published 2 years ago
Views 404
Introduction
This documentation provides you with detailed instructions on creating and managing approval workflows within Sands-Social. Approval workflows allow you to establish content approval processes that suit your organization's needs and ensure the quality of your social media posts.
Accessing Approval Workflows
To access and manage approval workflows, follow these steps:
1. Login: Log in to your account on Sands-Social.
2. Navigation: From the left-side navigation bar, click on "Publishing."
3. Approval Workflows: Under the "Publishing" section, select the "Approval Workflows" tab.
Creating a New Workflow

To create a new approval workflow, follow these instructions:
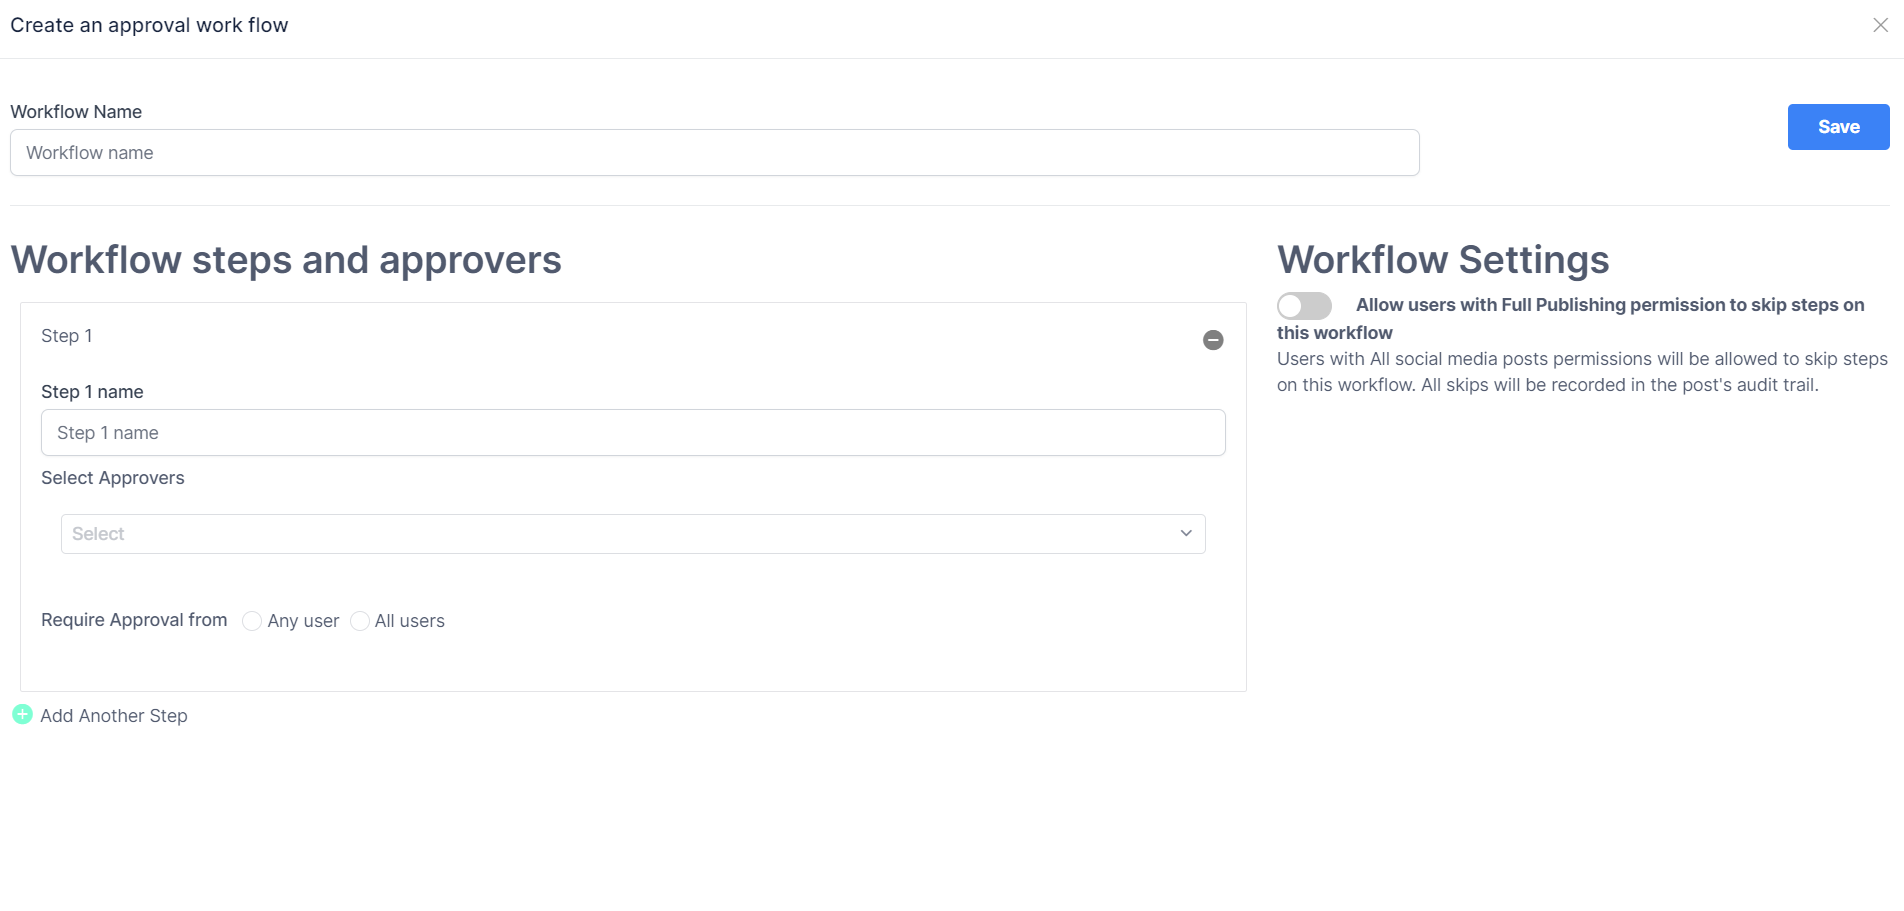
1. Create Workflow: On the "Approval Work Flows" page, click the "Create Approval Workflow" button. A pop-up window will appear.
2. Workflow Name: In the pop-up, enter a descriptive name for the workflow.
Setting Workflow Steps and Approvers
To set up workflow steps and assign approvers, follow these steps:
1. Workflow Steps: Define the steps required for the workflow. For each step, specify the user who needs to approve the content.
2. Approvers: Assign approvers to each step. You can choose from users within your organization who have the authority to approve content.
3. Skip Steps Option: If applicable, indicate whether users with the necessary permissions can skip certain steps in the workflow.
Saving and Managing Workflows
To save and manage your approval workflows, follow these instructions:
1. Save: After configuring the workflow steps and approvers, click the "Save" button at the top right corner of the pop-up to save the workflow.
2. Manage Workflows: Back on the "Approval Workflows" page, you'll see the list of created workflows. From here, you can edit, delete, enable or disable existing workflows.
Conclusion
Congratulations! You've successfully learned how to create and manage approval workflows on Sands-Social. By implementing these workflows, you can ensure that your content is reviewed and approved by the appropriate individuals before being posted on social media.
For any inquiries, difficulties, or assistance regarding approval workflows, feel free to reach out to our support team at support@sands-social.com.
Thank you for choosing Sands-Social to enhance your content management.
